Documentation/Platforms/OpenRISC: Difference between revisions
(Initial commit) |
No edit summary |
||
| (20 intermediate revisions by 2 users not shown) | |||
| Line 1: | Line 1: | ||
== Description == | == Description == | ||
OpenRISC is an open source processor architecture. While instruction sets like x86 are proprietary and owned by a single company, OpenRISC is free. Its main use is as a processor on | OpenRISC is an open source processor architecture. While instruction sets like x86 are proprietary and owned by a single company, OpenRISC is free. Its main use is as a processor on embedded systems. | ||
== | == Build Directions == | ||
qemu-system- | ./configure --target-list='or1k-softmmu or1k-linux-user' && make | ||
qemu-system-or1k | |||
== Full system emulation == | |||
To boot linux you can run the following. If you are starting out you can download the OpenRISC test image from [[Testing/System_Images]]. The test image may be gzipped, so be sure to gunzip it first. | |||
wget http://shorne.noip.me/downloads/or1k-linux-5.0.gz | |||
gunzip or1k-linux-5.0.gz | |||
qemu-system-or1k -cpu or1200 -M or1k-sim -kernel or1k-linux-5.0 -serial stdio -nographic -monitor none | |||
== Multicore emulation == | |||
OpenRISC Linux and QEMU also have support for running with multiple CPU cores. This can be done with the '''-smp''' argument as seen in the following commands: | |||
wget http://shorne.noip.me/downloads/or1k-linux-5.0-smp.gz | |||
gunzip or1k-linux-5.0-smp.gz | |||
qemu-system-or1k -cpu or1200 -M or1k-sim -kernel or1k-linux-5.0-smp -serial stdio -nographic -monitor none -smp cpus=2 | |||
== Networking emulation == | |||
The <tt>or1k-sim</tt> will wire in an <tt>opencore_eth</tt> device at address <tt>0x92000000</tt> which can be used when the qemu '''-net''' option is provided. This device is supported by the Linux kernel's <tt>ethoc</tt> Ethernet driver. | |||
The below options can be added to the qemu command line to enable networking. | |||
-net nic -net tap,ifname=tap0,script=no,downscript=no | |||
Qemu has a default set of networking setup scripts you can use which will create a tunnel device for you, these have been disabled with the above ''script'' and ''downscript'' command line options. If we disable the qemu startup commands we will need to create our own tun and tap0 devices which can be done with the below commands. | |||
Note, this sets up the tap0 device to be on the '''10.8.0.0/24''' network. This matches the static setup found in the test image. | |||
IPRANGE=10.8.0 | |||
echo "Setup tun device for QEmu networking, (may need sudo)..." | |||
# Make the tap0 dev node if it doesn't exist | |||
if [ ! -e /dev/net/tap0 ]; then | |||
sudo true | |||
sudo mknod /dev/net/tap0 c 10 200 | |||
sudo chown $(whoami) /dev/net/tap0 | |||
fi | |||
# Check that the tap0 network interface exists | |||
if [ ! -e /sys/class/net/tap0 ]; then | |||
sudo true | |||
if sudo which openvpn > /dev/null; then | |||
sudo openvpn --mktun --dev tap0 --user $(whoami) | |||
elif sudo which tunctl > /dev/null; then | |||
sudo tunctl -t tap0 -u $(whoami) | |||
else | |||
echo "Unable to find tool to create tap0 device!" | |||
exit 1 | |||
fi | |||
fi | |||
# Check the tap0 device if configure and up | |||
if sudo which ifconfig > /dev/null; then | |||
if ! ifconfig tap0 | grep -q "UP" || ! ifconfig tap0 | grep -q "$IPRANGE.100"; then | |||
sudo true | |||
sudo ifconfig tap0 $IPRANGE.100 netmask 255.255.255.0 up | |||
fi | |||
elif sudo which ip > /dev/null; then | |||
if ! ip addr show tap0 | grep -q "UP" || ! ip addr show tap0 | grep -q "$IPRANGE.100"; then | |||
sudo true | |||
sudo ip addr add $IPRANGE.100/24 dev tap0 | |||
sudo ip link set dev tap0 up | |||
fi | |||
else | |||
echo "Unable to find tool to configure tap0 address" | |||
exit 1 | |||
fi | |||
The same setup can be achieved using qemu user mode networking on the '''10.8.0.0/24''' network. | |||
with the following command line option. | |||
-nic user,net=10.8.0.0/24,host=10.8.0.100,dns=10.8.0.3 | |||
This sets the network address ranges to '''10.8.0.0/24'''. It then configures the host (gateway) address | |||
to the expected '''10.8.0.100''' address and a dns server at '''10.8.0.3'''. | |||
== User mode emulation == | |||
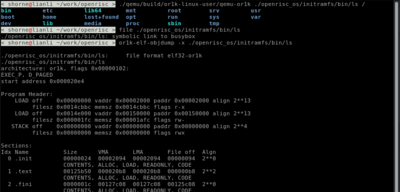
Using QEMU user mode emulation we can run and debug OpenRISC binaries on your host linux. | |||
$ cat main.c | |||
#include <stdio.h> | |||
int main() { | |||
printf ("hello\n"); | |||
return 0; | |||
} | |||
$ or1k-linux-musl-gcc main.c | |||
# Here $LDPATH/lib/ld-musl-or1k.so.1 is linked to or1k-linux-musl/lib/libc.so | |||
$ qemu-or1k -L $LDPATH ./a.out | |||
hello | |||
== Debugging Tips == | |||
For debugging QEMU can listen on a gdb stub port with the below options. Note, you can also use <tt>-S</tt> with the <tt>-gdb</tt> option to have QEMU wait for a gdb client connection before starting the boot process. | |||
-gdb tcp::10001 | |||
To get good traces you can also add the following, this will output trace info to the file <tt>trace.txt</tt> | |||
-D trace.txt -d in_asm,exec,int,op_opt | |||
== Pictures == | |||
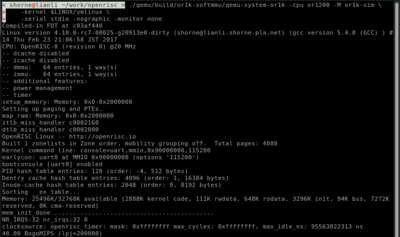
[[File:openrisc-system-boot-screenshot.png|400px|Linux booting up]]<span style="margin:20px;"></span> | |||
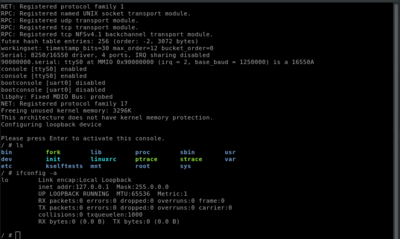
[[File:openrisc-system-commands-screenshot.png|400px|Linux command line execution]]<br><br> | |||
[[File:openrisc-user-screenshot.png|400px|User mode]]<br> | |||
== Links == | == Links == | ||
[https://www.youtube.com/watch?v=dYcxLHf0Ez4 Video introducing OpenRISC] | * [https://www.youtube.com/watch?v=dYcxLHf0Ez4 Video introducing OpenRISC] | ||
[http://openrisc.io/ The OpenRISC project site] | * [http://openrisc.io/ The OpenRISC project site] | ||
[https://github.com/openrisc/doc/blob/master/openrisc-arch-1.1-rev0.pdf?raw=true OpenRISC 1000 specification] | * [https://github.com/openrisc/doc/blob/master/openrisc-arch-1.1-rev0.pdf?raw=true OpenRISC 1000 specification] | ||
* [https://github.com/openrisc/or1k-gcc/releases GCC toolchain releases and binaries] | |||
== Contacts == | == Contacts == | ||
Maintainer: [mailto: | Maintainer: [mailto:shorne@gmail.com Stafford Horne] | ||
Latest revision as of 21:34, 4 July 2022
Description
OpenRISC is an open source processor architecture. While instruction sets like x86 are proprietary and owned by a single company, OpenRISC is free. Its main use is as a processor on embedded systems.
Build Directions
./configure --target-list='or1k-softmmu or1k-linux-user' && make
Full system emulation
To boot linux you can run the following. If you are starting out you can download the OpenRISC test image from Testing/System_Images. The test image may be gzipped, so be sure to gunzip it first.
 wget http://shorne.noip.me/downloads/or1k-linux-5.0.gz
 gunzip or1k-linux-5.0.gz
 qemu-system-or1k -cpu or1200 -M or1k-sim -kernel or1k-linux-5.0 -serial stdio -nographic -monitor none
Multicore emulation
OpenRISC Linux and QEMU also have support for running with multiple CPU cores. This can be done with the -smp argument as seen in the following commands:
 wget http://shorne.noip.me/downloads/or1k-linux-5.0-smp.gz
 gunzip or1k-linux-5.0-smp.gz
 qemu-system-or1k -cpu or1200 -M or1k-sim -kernel or1k-linux-5.0-smp -serial stdio -nographic -monitor none -smp cpus=2
Networking emulation
The or1k-sim will wire in an opencore_eth device at address 0x92000000 which can be used when the qemu -net option is provided. This device is supported by the Linux kernel's ethoc Ethernet driver.
The below options can be added to the qemu command line to enable networking.
-net nic -net tap,ifname=tap0,script=no,downscript=no
Qemu has a default set of networking setup scripts you can use which will create a tunnel device for you, these have been disabled with the above script and downscript command line options. If we disable the qemu startup commands we will need to create our own tun and tap0 devices which can be done with the below commands.
Note, this sets up the tap0 device to be on the 10.8.0.0/24 network. This matches the static setup found in the test image.
 IPRANGE=10.8.0
 echo "Setup tun device for QEmu networking, (may need sudo)..."

 # Make the tap0 dev node if it doesn't exist
 if [ ! -e /dev/net/tap0 ]; then
     sudo true
     sudo mknod /dev/net/tap0 c 10 200
     sudo chown $(whoami) /dev/net/tap0
 fi

 # Check that the tap0 network interface exists
 if [ ! -e /sys/class/net/tap0 ]; then
     sudo true
     if sudo which openvpn > /dev/null; then
         sudo openvpn --mktun --dev tap0 --user $(whoami)
     elif sudo which tunctl > /dev/null; then
         sudo tunctl -t tap0 -u $(whoami)
     else
         echo "Unable to find tool to create tap0 device!"
         exit 1
     fi
 fi

 # Check the tap0 device if configure and up
 if sudo which ifconfig > /dev/null; then
     if ! ifconfig tap0 | grep -q "UP" || ! ifconfig tap0 | grep -q "$IPRANGE.100"; then
         sudo true
         sudo ifconfig tap0 $IPRANGE.100 netmask 255.255.255.0 up
     fi
 elif sudo which ip > /dev/null; then
     if ! ip addr show tap0 | grep -q "UP" || ! ip addr show tap0 | grep -q "$IPRANGE.100"; then
         sudo true
         sudo ip addr add $IPRANGE.100/24 dev tap0
         sudo ip link set dev tap0 up
     fi
 else
     echo "Unable to find tool to configure tap0 address"
     exit 1
 fi
The same setup can be achieved using qemu user mode networking on the 10.8.0.0/24 network. with the following command line option.
-nic user,net=10.8.0.0/24,host=10.8.0.100,dns=10.8.0.3
This sets the network address ranges to 10.8.0.0/24. It then configures the host (gateway) address to the expected 10.8.0.100 address and a dns server at 10.8.0.3.
User mode emulation
Using QEMU user mode emulation we can run and debug OpenRISC binaries on your host linux.
 $ cat main.c
 #include <stdio.h>
 int main() {
    printf ("hello\n");
    return 0;
 }
 $ or1k-linux-musl-gcc main.c
 # Here $LDPATH/lib/ld-musl-or1k.so.1 is linked to or1k-linux-musl/lib/libc.so
 $ qemu-or1k -L $LDPATH ./a.out
 hello
Debugging Tips
For debugging QEMU can listen on a gdb stub port with the below options. Note, you can also use -S with the -gdb option to have QEMU wait for a gdb client connection before starting the boot process.
-gdb tcp::10001
To get good traces you can also add the following, this will output trace info to the file trace.txt
-D trace.txt -d in_asm,exec,int,op_opt
Pictures
Links
- Video introducing OpenRISC
- The OpenRISC project site
- OpenRISC 1000 specification
- GCC toolchain releases and binaries
Contacts
Maintainer: Stafford Horne


