Documentation/Platforms/PowerPC: Difference between revisions
| (27 intermediate revisions by 3 users not shown) | |||
| Line 1: | Line 1: | ||
== PowerPC Emulator == | == PowerPC Emulator (32-bit) == | ||
=== Description === | === Description === | ||
This page is about qemu-system-ppc. | This page is about qemu-system-ppc. | ||
| Line 11: | Line 11: | ||
</tr> | </tr> | ||
<tr> | <tr> | ||
<td>- | <td>-M g3beige </td><td>Heathrow based PowerMAC (default)</td> | ||
</tr> | </tr> | ||
<tr> | <tr> | ||
<td>- | <td>-M mac99 </td><td>Mac99 based PowerMAC<tr> | ||
</tr> | </tr> | ||
<tr> | <tr> | ||
<td>- | <td>-M 40p </td><td>IBM RS/6000 7020 (40p)</td> | ||
</tr> | </tr> | ||
<tr> | <tr> | ||
<td>- | <td>-M bamboo </td><td>Bamboo</td> | ||
</tr> | </tr> | ||
<tr> | <tr> | ||
<td>- | <td>-M mpc8544ds </td><td>Mpc8544ds</td> | ||
</tr> | </tr> | ||
<tr> | <tr> | ||
<td>- | <td>-M none </td><td>Empty machine</td> | ||
</tr> | </tr> | ||
<tr> | <tr> | ||
<td>- | <td>-M ppce500 </td><td>Generic paravirt e500 platform</td> | ||
</tr> | </tr> | ||
<tr> | <tr> | ||
<td>- | <td>-M prep </td><td>PowerPC PREP platform (deprecated in favour of the 40p machine )</td> | ||
</tr> | </tr> | ||
<tr> | <tr> | ||
<td>- | <td>-M ref405ep </td><td>Ref405ep</td> | ||
</tr> | </tr> | ||
<tr> | <tr> | ||
<td>- | <td>-M amigaone </td><td>Eyetech AmigaOne/Mai Logic Teron</td> | ||
</tr> | </tr> | ||
<tr> | <tr> | ||
<td>- | <td>-M sam460ex </td><td>aCube Sam460ex</td> | ||
</tr> | </tr> | ||
<tr> | <tr> | ||
<td>- | <td>-M virtex-ml507 </td><td>Xilinx Virtex ML507 reference design</td> | ||
</table> | </table> | ||
| Line 56: | Line 56: | ||
Pre-built binaries for OSX are provided at the emaculation website: https://www.emaculation.com/forum/viewtopic.php?f=34&t=8848 <br> | Pre-built binaries for OSX are provided at the emaculation website: https://www.emaculation.com/forum/viewtopic.php?f=34&t=8848 <br> | ||
Experimental builds for Windows/OSX with e.g., sound support are provided at the emaculation website: https://www.emaculation.com/forum/viewtopic.php?f=34&t=8848&p=52102#p52104 and here: https://www.emaculation.com/forum/viewtopic.php?f=34&t=9028 | Experimental builds for Windows/OSX with e.g., sound support are provided at the emaculation website: https://www.emaculation.com/forum/viewtopic.php?f=34&t=8848&p=52102#p52104 and here: https://www.emaculation.com/forum/viewtopic.php?f=34&t=9028 | ||
=== Additional guides === | |||
Some guides detailing running Mac OS/ OS X or Amiga-like OSes are available off-site:<br> | |||
https://www.emaculation.com/doku.php/qemu/ <br> | |||
http://zero.eik.bme.hu/~balaton/qemu/amiga/ | |||
=== PowerMac G4 and G3 emulation === | === PowerMac G4 and G3 emulation === | ||
| Line 68: | Line 73: | ||
</tr> | </tr> | ||
<tr> | <tr> | ||
<td>- | <td>-M mac99,via=pmu </td><td>pmu power management, providing USB mouse and keyboard</td> | ||
</tr> | </tr> | ||
<tr> | <tr> | ||
<td>- | <td>-M mac99,via=pmu-adb </td><td>pmu power management with adb bus for older OSs not supporting USB</td> | ||
</tr> | </tr> | ||
<tr> | <tr> | ||
<td>- | <td>-M mac99,via=cuda </td><td>cuda power management with adb bus (this is the default)</td> | ||
</tr> | </tr> | ||
</table> | </table> | ||
| Line 157: | Line 162: | ||
==== Mac OS 9.x to Mac OS X 10.4 ==== | ==== Mac OS 9.x to Mac OS X 10.4 ==== | ||
Command-line options to install Mac OS | Command-line options to install Mac OS:<br> | ||
./qemu-system-ppc -L pc-bios -boot d -M mac99 -m 512 -hda <hd image file> -cdrom <iso file of installation media> | ./qemu-system-ppc -L pc-bios -boot d -M mac99 -m 512 -hda <hd image file> -cdrom <iso file of installation media> | ||
- | |||
Command-line options to run Mac OS:<br> | |||
./qemu-system-ppc -L pc-bios -boot c -M mac99 -m 512 -hda <hd image file> | |||
==== Mac OS X 10.5 ==== | ==== Mac OS X 10.5 ==== | ||
Command-line options to install Mac OS X 10. | Command-line options to install Mac OS X 10.5:<br> | ||
./qemu-system-ppc -L pc-bios -boot d -M mac99,via=pmu -m 512 -hda <hd image file> -cdrom <iso file of installation media> | ./qemu-system-ppc -L pc-bios -boot d -M mac99,via=pmu -m 512 -hda <hd image file> -cdrom <iso file of installation media> | ||
- | |||
Command-line options to run Mac OS X 10.5:<br> | |||
./qemu-system-ppc -L pc-bios -boot c -M mac99,via=pmu -m 512 -hda <hd image file> | |||
==== Mac OS X Server 1.2v3 ==== | ==== Mac OS X Server 1.2v3 ==== | ||
Installation requires several steps: <br> | Installation requires several steps. Only use an .img HD, qcow2 will not work: <br> | ||
Step 1: boot from installation CD, use disk utility to partition disk as Apple Server, start the installation and let it fail. Quit Qemu and reboot with command line in step 2. | Step 1: boot from installation CD, use disk utility to partition disk as Apple Server, start the installation and let it fail. Quit Qemu and reboot with command line in step 2. | ||
./qemu-system-ppc -L pc-bios -boot d -M mac99,via=pmu-adb -m 256 -net none -prom-env "auto-boot?=true" -prom-env "boot-args=-v" \ | ./qemu-system-ppc -L pc-bios -boot d -M mac99,via=pmu-adb -m 256 -net none -prom-env "auto-boot?=true" -prom-env "boot-args=-v" \ | ||
-cdrom OSXServer1.2v3.iso -hda OSXServer1.2v3. | -cdrom OSXServer1.2v3.iso -hda OSXServer1.2v3.img | ||
Step 2: initial installation (note machine and CPU, otherwise no desktop is shown). | Step 2: initial installation (note machine and CPU, otherwise no desktop is shown). | ||
./qemu-system-ppc -L pc-bios -boot d -M g3beige -cpu G3 -m 256 -prom-env "boot-args=-v" -prom-env "auto-boot?=false" -net none \ | ./qemu-system-ppc -L pc-bios -boot d -M g3beige -cpu G3 -m 256 -prom-env "boot-args=-v" -prom-env "auto-boot?=false" -net none \ | ||
-hda OSXServer1.2v3. | -hda OSXServer1.2v3.img -cdrom OSXServer1.2v3.iso | ||
At the boot prompt enter "boot cd:9,\\:tbxi" Initial installation starts. Quit Qemu after completion. | At the boot prompt enter "boot cd:9,\\:tbxi" Initial installation starts. Quit Qemu after completion. | ||
| Line 180: | Line 189: | ||
Step 3: Installation continued. Boot with the following command line to complete the installation. | Step 3: Installation continued. Boot with the following command line to complete the installation. | ||
./qemu-system-ppc -L pc-bios -boot c -M g3beige -cpu G3 -m 256 -prom-env "boot-args=-v" -prom-env "auto-boot?=true" -net none \ | ./qemu-system-ppc -L pc-bios -boot c -M g3beige -cpu G3 -m 256 -prom-env "boot-args=-v" -prom-env "auto-boot?=true" -net none \ | ||
-hda OSXServer1.2v3. | -hda OSXServer1.2v3.img -cdrom OSXServer1.2v3.iso | ||
Step 4: Boot the installed system: | Step 4: Boot the installed system: | ||
./qemu-system-ppc -L pc-bios -boot c -M g3beige -cpu G3 -m 256 -prom-env "boot-args=-v" -prom-env "auto-boot?=true" -net none \ | ./qemu-system-ppc -L pc-bios -boot c -M g3beige -cpu G3 -m 256 -prom-env "boot-args=-v" -prom-env "auto-boot?=true" -net none \ | ||
-hda OSXServer1.2v3. | -hda OSXServer1.2v3.img -cdrom OSXServer1.2v3.iso | ||
==== Lubuntu 14 ==== | ==== Lubuntu 14 ==== | ||
Installation: | Installation: | ||
./qemu-system-ppc -L pc-bios -boot d -M mac99,via=pmu -m 1024 | ./qemu-system-ppc -L pc-bios -boot d -M mac99,via=pmu -m 1024 \ | ||
-hda lubuntu14.qcow2 -cdrom lubuntu-14.04.5-desktop-powerpc.iso | -hda lubuntu14.qcow2 -cdrom lubuntu-14.04.5-desktop-powerpc.iso | ||
Running: | Running: | ||
./qemu-system-ppc -L pc-bios -boot c -prom-env "boot-device=hd:,\yaboot" -prom-env "boot-args=conf=hd:,\yaboot.conf" \ | ./qemu-system-ppc -L pc-bios -boot c -prom-env "boot-device=hd:,\yaboot" -prom-env "boot-args=conf=hd:,\yaboot.conf" \ | ||
-M mac99,via=pmu -m 1024 | -M mac99,via=pmu -m 1024 -hda lubuntu14.qcow2 | ||
==== Fedora 12 ==== | ==== Fedora 12 ==== | ||
Installing: | Installing: | ||
./qemu-system-ppc -L pc-bios -boot d -M mac99,via=pmu -m 1024 | ./qemu-system-ppc -L pc-bios -boot d -M mac99,via=pmu -m 1024 \ | ||
-hda fedora12.qcow2 -cdrom Fedora-12-ppc-DVD.iso -g 1024x768x16 | -hda fedora12.qcow2 -cdrom Fedora-12-ppc-DVD.iso -g 1024x768x16 | ||
Running: | Running: | ||
./qemu-system-ppc -L pc-bios -boot c -prom-env "boot-device=hd:,\yaboot" -prom-env "boot-args=conf=hd:,\yaboot.conf" \ | ./qemu-system-ppc -L pc-bios -boot c -prom-env "boot-device=hd:,\yaboot" -prom-env "boot-args=conf=hd:,\yaboot.conf" \ | ||
-M mac99,via=pmu -m 1024 | -M mac99,via=pmu -m 1024 -hda fedora12.qcow2 -g 1024x768x32 | ||
==== Debian 10 (Buster) ==== | ==== Debian 10 (Buster) ==== | ||
Note: To get a graphical desktop, at software selection, remove the default desktop environment and install only Xfce<br> | Note: To get a graphical desktop, at software selection, remove the default desktop environment and install only Xfce<br> | ||
Installing: | Installing: | ||
./qemu-system-ppc -L pc-bios -boot d -M mac99,via=pmu -m 1024 | ./qemu-system-ppc -L pc-bios -boot d -M mac99,via=pmu -m 1024 \ | ||
-hda debian10.qcow2 -cdrom debian-10.0-powerpc-NETINST-1.iso -g 1024x768x8 | -hda debian10.qcow2 -cdrom debian-10.0-powerpc-NETINST-1.iso -g 1024x768x8 | ||
Running: | Running: | ||
./qemu-system-ppc -L pc-bios -boot c -prom-env "boot-device=hd:,\yaboot" -prom-env "boot-args=conf=hd:,\yaboot.conf" \ | ./qemu-system-ppc -L pc-bios -boot c -prom-env "boot-device=hd:,\yaboot" -prom-env "boot-args=conf=hd:,\yaboot.conf" \ | ||
-M mac99,via=pmu -m 1024 | -M mac99,via=pmu -m 1024 -hda debian10.qcow2 -g 1024x768x32 | ||
At the Linux boot prompt enter "Linux modprobe.blacklist=bochs_drm" <br> | At the Linux boot prompt enter "Linux modprobe.blacklist=bochs_drm" <br> | ||
| Line 217: | Line 226: | ||
These images boot with: | These images boot with: | ||
./qemu-system-ppc -L pc-bios -boot c -M mac99,via=pmu -m 1024 | ./qemu-system-ppc -L pc-bios -boot c -M mac99,via=pmu -m 1024 \ | ||
-hda debian_wheezy_powerpc_desktop.qcow2 -g 1024x768x32 | -hda debian_wheezy_powerpc_desktop.qcow2 -g 1024x768x32 | ||
| Line 223: | Line 232: | ||
Installing: <br> | Installing: <br> | ||
./qemu-system-ppc -L pc-bios -boot d -M mac99,via=pmu -m 512 -net nic,model=rtl8139 \ | ./qemu-system-ppc -L pc-bios -boot d -M mac99,via=pmu -m 512 -net nic,model=rtl8139 \ | ||
-net user -hda opensuse11.qcow2 -cdrom opensuse11.iso -g | -net user -hda opensuse11.qcow2 -cdrom opensuse11.iso -g 1024x768x16 | ||
Once the license screen appears, press Ctrl-Alt-Shift-X to open a terminal. Follow https://en.opensuse.org/SDB:Install_openSUSE_on_an_Apple_PPC_computer to create partitions with pdisk. Write the map after partitioning and continue with Yast. Once Yast arrives at partitioning, select Expert partitioning, select the Hard disk and click Rescan disk. | Once the license screen appears, press Ctrl-Alt-Shift-X to open a terminal. Follow https://en.opensuse.org/SDB:Install_openSUSE_on_an_Apple_PPC_computer to create partitions with pdisk. Write the map after partitioning and continue with Yast. Once Yast arrives at partitioning, select Expert partitioning, select the Hard disk and click Rescan disk. | ||
| Line 240: | Line 249: | ||
./qemu-system-ppc -L pc-bios -boot d -M mac99,via=pmu -m 1024 \ | ./qemu-system-ppc -L pc-bios -boot d -M mac99,via=pmu -m 1024 \ | ||
-netdev user,id=network01 -device rtl8139,netdev=network01 \ | -netdev user,id=network01 -device rtl8139,netdev=network01 \ | ||
-cdrom <installation-image> -hda <hard disk image> -g | -cdrom <installation-image> -hda <hard disk image> -g 1024x768x16 | ||
Running: <br> | Running: <br> | ||
./qemu-system-ppc -L pc-bios -boot c -M mac99,via=pmu -m 1024\ | ./qemu-system-ppc -L pc-bios -boot c -M mac99,via=pmu -m 1024 \ | ||
-prom-env "boot-device=hd:,\yaboot" -prom-env "boot-args=conf=hd:,\yaboot.conf" \ | -prom-env "boot-device=hd:,\yaboot" -prom-env "boot-args=conf=hd:,\yaboot.conf" \ | ||
-netdev user,id=network01 -device rtl8139,netdev=network01 \ | -netdev user,id=network01 -device rtl8139,netdev=network01 \ | ||
-hda <hard disk image> -g | -hda <hard disk image> -g 1024x768x16 | ||
=== IBM RS/6000 7020 (40p) === | === IBM RS/6000 7020 (40p) === | ||
| Line 255: | Line 264: | ||
Booting: | Booting: | ||
./qemu-system-ppc -M 40p -cdrom zImage.initrd.sandalfoot -boot d | ./qemu-system-ppc -M 40p -cdrom zImage.initrd.sandalfoot -boot d | ||
<!-- Booting AIX 5.1 (will become available in Qemu 4.1, take q40pofw-serial.rom from https://github.com/artyom-tarasenko/openfirmware/releases/download/20190406-AIX-boots/q40pofw-serial.rom) qemu-system-ppc -M 40p -bios q40pofw-serial.rom -serial telnet::4441,server -hda aix-hdd.qcow2 -cdrom \ | |||
/path/to/aix-5.1-cd1.iso -vga none -nographic --> | |||
=== Bamboo === | === Bamboo === | ||
| Line 279: | Line 291: | ||
./qemu-system-ppc -m ref405ep | ./qemu-system-ppc -m ref405ep | ||
=== Eyetech AmigaOne/Mai Logic Teron === | |||
The AmigaNG boards (amigaone, pegasos2, sam460ex) are primarily used for running Amiga-like OSes (AmigaOS 4, MorphOS and AROS) but these can also run Linux. | |||
Eyetech AmigaOne/Mai Logic Teron (amigaone) | |||
The amigaone machine emulates an AmigaOne XE mainboard by Eyetech which is a rebranded Mai Logic Teron board with modified U-Boot firmware to support AmigaOS 4. | |||
Emulated devices: | |||
* PowerPC 7457 CPU (can also use``-cpu g3, 750cxe, 750fx`` or ``750gx``) | |||
* Articia S north bridge | |||
* VIA VT82C686B south bridge | |||
* PCI VGA compatible card (guests may need other card instead) | |||
* PS/2 keyboard and mouse | |||
To boot, a modified U-Boot binary is needed. While released under GPL, its source is lost so it cannot be included in QEMU. | |||
A binary is available at https://www.hyperion-entertainment.com/index.php/downloads?view=files&parent=28. | |||
The ROM image is in the last 512kB of the file, which, on a linux host, can be extracted with the command: | |||
tail -c 524288 updater.image > u-boot-amigaone.bin | |||
The BIOS emulator in the firmware is unable to run QEMU‘s standard vgabios so VGABIOS-lgpl-latest.bin is needed instead. | |||
This can be downloaded from http://www.nongnu.org/vgabios. | |||
You can find some Linux images that work on the amigaone machine at the following link: | |||
https://sourceforge.net/projects/amigaone-linux/files/debian-installer/ | |||
Booting: | |||
./qemu-system-ppc -machine amigaone -bios u-boot-amigaone.bin \ | |||
-cdrom "A1 Linux Net Installer.iso" \ | |||
-device ati-vga,model=rv100,romfile=VGABIOS-lgpl-latest.bin | |||
From the firmware menu that appears select Boot sequence, Amiga Multiboot Options and set Boot device 1 to Onboard VIA IDE CDROM. | |||
Then hit escape until the main screen appears, hit escape once more and from the exit menu select either Save settings and exit or Use settings for this session only. | |||
It may take a long time loading the kernel into memory but eventually it boots and the installer becomes visible. | |||
The ati-vga RV100 emulation is not complete yet so only frame buffer works, DRM and 3D is not available. | |||
=== aCube Sam460ex === | === aCube Sam460ex === | ||
| Line 286: | Line 335: | ||
-drive if=none,id=cd,file=Sam460InstallCD-53.58.iso,format=raw \ | -drive if=none,id=cd,file=Sam460InstallCD-53.58.iso,format=raw \ | ||
-device ide-cd,drive=cd,bus=ide.1 | -device ide-cd,drive=cd,bus=ide.1 | ||
=== Xilinx Virtex ML507 reference design === | === Xilinx Virtex ML507 reference design === | ||
| Line 322: | Line 367: | ||
boot hd:,\\:tbxi<BR> | boot hd:,\\:tbxi<BR> | ||
=== Debugging qemu-system-ppc with | === Debugging qemu-system-ppc with GDB on an x86 Linux host === | ||
To build gdb-powerpc-linux on Linux, you need the normal build tools such as GCC installed. | To build gdb-powerpc-linux on Linux, you need the normal build tools such as GCC installed. | ||
| Line 379: | Line 424: | ||
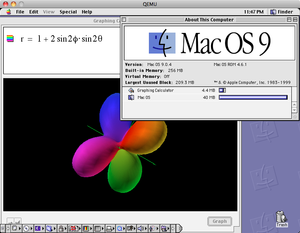
[[File:MacOS9_with_Graphing_Calculator.png|300px|Mac OS 9 with Graphing Calculator running]]<span style="margin:20px;"></span> | [[File:MacOS9_with_Graphing_Calculator.png|300px|Mac OS 9 with Graphing Calculator running]]<span style="margin:20px;"></span> | ||
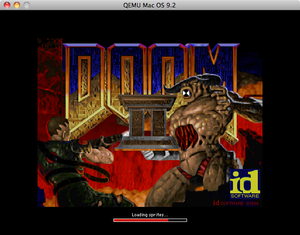
[[File:Doom_running_in_Mac_OS_9.png|300px|Doom running in Mac OS 9.2]]<BR> | [[File:Doom_running_in_Mac_OS_9.png|300px|Doom running in Mac OS 9.2]]<BR> | ||
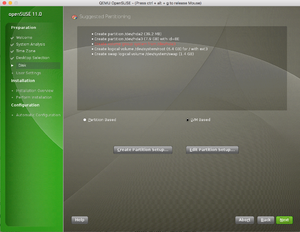
[[File:OpenSUSE.png|300px|OpenSUSE]]<BR> | |||
<BR> | <BR> | ||
Latest revision as of 19:36, 17 February 2024
PowerPC Emulator (32-bit)
Description
This page is about qemu-system-ppc.
Note: Information below true for qemu-system-ppc builds as of 14-03-2019
The following machines are emulated through qemu-system-ppc:
| Machine model selector | Provides |
| -M g3beige | Heathrow based PowerMAC (default) |
| -M mac99 | Mac99 based PowerMAC |
| -M 40p | IBM RS/6000 7020 (40p) |
| -M bamboo | Bamboo |
| -M mpc8544ds | Mpc8544ds |
| -M none | Empty machine |
| -M ppce500 | Generic paravirt e500 platform |
| -M prep | PowerPC PREP platform (deprecated in favour of the 40p machine ) |
| -M ref405ep | Ref405ep |
| -M amigaone | Eyetech AmigaOne/Mai Logic Teron |
| -M sam460ex | aCube Sam460ex |
| -M virtex-ml507 | Xilinx Virtex ML507 reference design |
Build directions
./configure --target-list=ppc-softmmu && make
Due to mouse issues when using the default GTK GUI in Windows, it is advisable to use the SDL-based GUI when compiling on/for that platform:
./configure --target-list=ppc-softmmu --enable-sdl && make
Pre-built binaries for Windows and OSX
Pre-built binaries for Windows can be found here: https://qemu.weilnetz.de/w64/
Pre-built binaries for OSX are provided at the emaculation website: https://www.emaculation.com/forum/viewtopic.php?f=34&t=8848
Experimental builds for Windows/OSX with e.g., sound support are provided at the emaculation website: https://www.emaculation.com/forum/viewtopic.php?f=34&t=8848&p=52102#p52104 and here: https://www.emaculation.com/forum/viewtopic.php?f=34&t=9028
Additional guides
Some guides detailing running Mac OS/ OS X or Amiga-like OSes are available off-site:
https://www.emaculation.com/doku.php/qemu/
http://zero.eik.bme.hu/~balaton/qemu/amiga/
PowerMac G4 and G3 emulation
PowerPC Mac G4 (Mac Model PowerPC3,1) and PowerPC Mac G3 emulation
The PowerPC Mac G4 -m mac99 machine model selector has three options:
| Machine model selector options | Provides |
| -M mac99,via=pmu | pmu power management, providing USB mouse and keyboard |
| -M mac99,via=pmu-adb | pmu power management with adb bus for older OSs not supporting USB |
| -M mac99,via=cuda | cuda power management with adb bus (this is the default) |
Optional commands:
| Optional commands | Default | Provides | |
| -prom-env "auto-boot?=true" | yes | Automatic boot at openbios prompt | |
| -prom-env "boot-args=-v" | no | Verbose start-up of OSX guests | |
| -prom-env "vga-ndrv?=true" | yes | On the fly resolution/colour depth switching for Mac OS/OS X guests | |
| -device VGA,edid=on | no | Provides additional screen resolutions for Mac OS/OS X guests |
Mac OS/OSX and Linux guest compatibility
| Operating system | Status | Remarks |
| Mac OS 8.0 to 8.6 | Not supported | |
| Mac OS 9.0 | Boots, installs, runs | Requires 9.0.4 with rom version 5.2.1 and above (e.g., 9.0.4 for the Cube) |
| Mac OS 9.1 | Boots, installs, runs | |
| Mac OS 9.2 | Boots, installs, runs | |
| Mac OS 10.0 | Boots, installs, runs | |
| Mac OS 10.1 | Boots, installs, runs | |
| Mac OS 10.2 | Boots, installs, runs | |
| Mac OS 10.3 | Boots, installs, runs | |
| Mac OS 10.4 | Boots, installs, runs | |
| Mac OS 10.5 | Boots, installs, runs | Requires -m mac99,via=pmu to run |
| Mac OSX Server 1.2v3 | Boots, installs, runs | No networking due to lack of gigabit ethernet support |
| Lubuntu 14 | Boots, installs, runs | Requires -g 1024x768x8 to see text while installing |
| Fedora 12 | Boots, installs, runs | Requires -g 1024x768x8 to see text while installing |
| Debian 10 | Boots, installs, runs | Requires -g 1024x768x8 to see text while installing |
| OpenSuse 11 | Boots, installs, runs | Requires -device rtl8139 for networking, -g 1024x768x8 to see text while installing |
| Yellow Dog Linux 6.2 | Boots, installs, runs | Requires -device rtl8139 for networking, -g 1024x768x8 to see text while installing |
Guest installation instructions
Mac OS 9.x to Mac OS X 10.4
Command-line options to install Mac OS:
./qemu-system-ppc -L pc-bios -boot d -M mac99 -m 512 -hda <hd image file> -cdrom <iso file of installation media>
Command-line options to run Mac OS:
./qemu-system-ppc -L pc-bios -boot c -M mac99 -m 512 -hda <hd image file>
Mac OS X 10.5
Command-line options to install Mac OS X 10.5:
./qemu-system-ppc -L pc-bios -boot d -M mac99,via=pmu -m 512 -hda <hd image file> -cdrom <iso file of installation media>
Command-line options to run Mac OS X 10.5:
./qemu-system-ppc -L pc-bios -boot c -M mac99,via=pmu -m 512 -hda <hd image file>
Mac OS X Server 1.2v3
Installation requires several steps. Only use an .img HD, qcow2 will not work:
Step 1: boot from installation CD, use disk utility to partition disk as Apple Server, start the installation and let it fail. Quit Qemu and reboot with command line in step 2.
 ./qemu-system-ppc -L pc-bios -boot d -M mac99,via=pmu-adb -m 256 -net none -prom-env "auto-boot?=true"  -prom-env "boot-args=-v" \
 -cdrom OSXServer1.2v3.iso -hda OSXServer1.2v3.img
Step 2: initial installation (note machine and CPU, otherwise no desktop is shown).
 ./qemu-system-ppc -L pc-bios -boot d -M g3beige -cpu G3 -m 256 -prom-env "boot-args=-v" -prom-env "auto-boot?=false" -net none \
 -hda OSXServer1.2v3.img -cdrom OSXServer1.2v3.iso
At the boot prompt enter "boot cd:9,\\:tbxi" Initial installation starts. Quit Qemu after completion.
Step 3: Installation continued. Boot with the following command line to complete the installation.
 ./qemu-system-ppc -L pc-bios -boot c -M g3beige -cpu G3 -m 256 -prom-env "boot-args=-v" -prom-env "auto-boot?=true" -net none \
 -hda OSXServer1.2v3.img -cdrom OSXServer1.2v3.iso
Step 4: Boot the installed system:
 ./qemu-system-ppc -L pc-bios -boot c -M g3beige -cpu G3 -m 256 -prom-env "boot-args=-v" -prom-env "auto-boot?=true" -net none \
 -hda OSXServer1.2v3.img -cdrom OSXServer1.2v3.iso
Lubuntu 14
Installation:
 ./qemu-system-ppc -L pc-bios -boot d -M mac99,via=pmu -m 1024 \
 -hda lubuntu14.qcow2 -cdrom lubuntu-14.04.5-desktop-powerpc.iso
Running:
 ./qemu-system-ppc -L pc-bios -boot c -prom-env "boot-device=hd:,\yaboot" -prom-env "boot-args=conf=hd:,\yaboot.conf" \
 -M mac99,via=pmu -m 1024 -hda lubuntu14.qcow2
Fedora 12
Installing:
 ./qemu-system-ppc -L pc-bios -boot d -M mac99,via=pmu -m 1024 \
 -hda fedora12.qcow2 -cdrom Fedora-12-ppc-DVD.iso -g 1024x768x16
Running:
 ./qemu-system-ppc -L pc-bios -boot c -prom-env "boot-device=hd:,\yaboot" -prom-env "boot-args=conf=hd:,\yaboot.conf" \
 -M mac99,via=pmu -m 1024 -hda fedora12.qcow2 -g 1024x768x32
Debian 10 (Buster)
Note: To get a graphical desktop, at software selection, remove the default desktop environment and install only Xfce
Installing:
 ./qemu-system-ppc -L pc-bios -boot d -M mac99,via=pmu -m 1024 \
 -hda debian10.qcow2 -cdrom debian-10.0-powerpc-NETINST-1.iso -g 1024x768x8
Running:
 ./qemu-system-ppc -L pc-bios -boot c -prom-env "boot-device=hd:,\yaboot" -prom-env "boot-args=conf=hd:,\yaboot.conf" \
 -M mac99,via=pmu -m 1024 -hda debian10.qcow2 -g 1024x768x32
At the Linux boot prompt enter "Linux modprobe.blacklist=bochs_drm"
Pre-installed images of Debian 6 (Squeeze) and 7 (Wheezy) (both minimal and with desktop) can be found here: https://people.debian.org/~aurel32/qemu/powerpc/
These images boot with:
 ./qemu-system-ppc -L pc-bios -boot c -M mac99,via=pmu -m 1024 \
 -hda debian_wheezy_powerpc_desktop.qcow2 -g 1024x768x32
OpenSuse 11
Installing:
 ./qemu-system-ppc -L pc-bios -boot d -M mac99,via=pmu -m 512 -net nic,model=rtl8139 \
 -net user -hda opensuse11.qcow2 -cdrom opensuse11.iso -g 1024x768x16
Once the license screen appears, press Ctrl-Alt-Shift-X to open a terminal. Follow https://en.opensuse.org/SDB:Install_openSUSE_on_an_Apple_PPC_computer to create partitions with pdisk. Write the map after partitioning and continue with Yast. Once Yast arrives at partitioning, select Expert partitioning, select the Hard disk and click Rescan disk.
Leave hda2 as it is.
Edit hda3 to format as Ext2, mount at /boot and set fstab option to: Mount in /etc/fstab by to Device Path (instead of Device ID)
Edit hda4 to format as Swap and set fstab option to: Mount in /etc/fstab by to Device Path (instead of Device ID)
Edit hda5 to format as Ext3, mount at / and set fstab option to: Mount in /etc/fstab by to Device Path (instead of Device ID)
Accept the partitioning and continue with formatting. Continue installing. There will be an error while the boot manager is being installed. Ignore it, do not retry and wait for the installation to finish and the system reboots. Quit Qemu at the openbios screen and edit your command line:
 ./qemu-system-ppc -L pc-bios -boot c -M mac99,via=pmu -m 512 -net nic,model=rtl8139 \
 -net user -hda opensuse11.qcow2 -cdrom opensuse11.iso -g 1024x768x32
Yellow Dog Linux 6.2
Installing:
 ./qemu-system-ppc -L pc-bios -boot d -M mac99,via=pmu -m 1024 \
 -netdev user,id=network01 -device rtl8139,netdev=network01 \
 -cdrom <installation-image> -hda <hard disk image> -g 1024x768x16
Running:
 ./qemu-system-ppc -L pc-bios -boot c -M mac99,via=pmu -m 1024 \
 -prom-env "boot-device=hd:,\yaboot" -prom-env "boot-args=conf=hd:,\yaboot.conf" \
 -netdev user,id=network01 -device rtl8139,netdev=network01 \
 -hda <hard disk image> -g 1024x768x16
IBM RS/6000 7020 (40p)
The 40p machine can be booted with the sandalfoot zImage from: http://www.juneau-lug.org/zImage.initrd.sandalfoot
Booting:
./qemu-system-ppc -M 40p -cdrom zImage.initrd.sandalfoot -boot d
Bamboo
./qemu-system-ppc -m bamboo
Mpc8544ds
./qemu-system-ppc -m mpc8544ds
Empty machine
./qemu-system-ppc -m none
Generic paravirt e500 platform
./qemu-system-ppc -m ppce500
PowerPC PREP platform (deprecated in favour of the 40p machine)
./qemu-system-ppc -m prep
Ref405ep
./qemu-system-ppc -m ref405ep
Eyetech AmigaOne/Mai Logic Teron
The AmigaNG boards (amigaone, pegasos2, sam460ex) are primarily used for running Amiga-like OSes (AmigaOS 4, MorphOS and AROS) but these can also run Linux.
Eyetech AmigaOne/Mai Logic Teron (amigaone) The amigaone machine emulates an AmigaOne XE mainboard by Eyetech which is a rebranded Mai Logic Teron board with modified U-Boot firmware to support AmigaOS 4.
Emulated devices:
* PowerPC 7457 CPU (can also use``-cpu g3, 750cxe, 750fx`` or ``750gx``)
* Articia S north bridge
* VIA VT82C686B south bridge
* PCI VGA compatible card (guests may need other card instead)
* PS/2 keyboard and mouse
To boot, a modified U-Boot binary is needed. While released under GPL, its source is lost so it cannot be included in QEMU. A binary is available at https://www.hyperion-entertainment.com/index.php/downloads?view=files&parent=28. The ROM image is in the last 512kB of the file, which, on a linux host, can be extracted with the command:
tail -c 524288 updater.image > u-boot-amigaone.bin
The BIOS emulator in the firmware is unable to run QEMU‘s standard vgabios so VGABIOS-lgpl-latest.bin is needed instead. This can be downloaded from http://www.nongnu.org/vgabios.
You can find some Linux images that work on the amigaone machine at the following link: https://sourceforge.net/projects/amigaone-linux/files/debian-installer/
Booting:
 ./qemu-system-ppc -machine amigaone -bios u-boot-amigaone.bin \
 -cdrom "A1 Linux Net Installer.iso" \
 -device ati-vga,model=rv100,romfile=VGABIOS-lgpl-latest.bin
From the firmware menu that appears select Boot sequence, Amiga Multiboot Options and set Boot device 1 to Onboard VIA IDE CDROM. Then hit escape until the main screen appears, hit escape once more and from the exit menu select either Save settings and exit or Use settings for this session only. It may take a long time loading the kernel into memory but eventually it boots and the installer becomes visible. The ati-vga RV100 emulation is not complete yet so only frame buffer works, DRM and 3D is not available.
aCube Sam460ex
Booting:
 ./qemu-system-ppc -machine sam460ex -rtc base=localtime \
 -drive if=none,id=cd,file=Sam460InstallCD-53.58.iso,format=raw \
 -device ide-cd,drive=cd,bus=ide.1
Xilinx Virtex ML507 reference design
./qemu-system-ppc -m virtex-ml507
Debugging tips
Command line options
-d unimp,guest_errors
(logs unimplemented features and guest errors to stdout)
-trace 'pmu_*'
(logs all PMU accesses to stdout)
-trace 'usb*'
(logs all USB accesses to stdout)
Macsbug
Macsbug can be used with Mac OS guest to tell you what exactly stopped booting. The link for it is below.
Mac OS 9.2 comes with a built-in debugger. To use it, set the OpenBIOS variable “APPL,debug”:
Via QEMU's command-line options:
-prom-env aapl,debug=2000000
In OpenBIOS type:
dev /
2000000 encode-int *Note: the number can be replaced with the many options available
“ AAPL,debug” property
then to boot from a cd type:
boot cd:,\\:tbxi
To boot from a hard drive image:
boot hd:,\\:tbxi
Debugging qemu-system-ppc with GDB on an x86 Linux host
To build gdb-powerpc-linux on Linux, you need the normal build tools such as GCC installed. Download the GDB source code. Version 7.9 is reported to work: http://ftp.gnu.org/gnu/gdb/gdb-7.9.tar.gz Unpack it and cd into the dir, then build and install with:
 ./configure -target=powerpc-linux --enable-sim-powerpc
 make && sudo make install
Launch qemu-system-ppc(64) with -s and -S. Qemu will pause and listen on port 1234 for GDB. Set -prom-env "auto-boot?=false" --nographic on the command line for the Qemu instance to be debugged.
qemu-system-ppc -s -S -prom-env "auto-boot?=false" --nographic
Open another terminal and launch the GDB you just built:
 gdb-powerpc-linux
 target remote localhost:1234
 continue
You can set a breakpoint in GDB, like this:
break *0x20dccc
Type "boot" in the terminal running Qemu.
Emulated hardware issues
Mac OS
-Only Mac OS 9.x support sound well. Use an experimental build.
-Mac OS 9.x will not boot with 64 Mb or less memory. They will also not boot with more than 1024 Mb.
Links
Installation images:
Lubuntu 14.04 PPC release
OpenSuse 11 PPC release
Fedora 12 PPC release
Ubuntu Mate 16.04 PPC release
Debian 10 PPC release
Yellow Dog Linux 6.2
Google Summer of Code Discussion for Mac OS 9
Macsbug 6.6.3 - debugger for Mac OS 9
Darwin OS installation iso file
JQEMU - graphical manager for QEMU (requires Java)
PowerPC Assembly Language Tutorial
QEMU PowerPC mailing list
Beige Power Mac G3 info
Sawtooth Power Mac G4 info
Pictures
How do I help
QEMU has many systems that can always be improved. Here is a brief list of possible areas you may want to work on:
- Documentation
- Testing
- Fixing operating system compatibility issues
- PowerPC emulation
- User interface
- OpenBIOS (firmware)
- Implement a 3D video card
- Improve various hardware (via-cuda, ata controller, etc..)
Knowledge in these areas could help:
- PowerPC Assembly
- 68K Assembly
- Embedded Programming
Contacts
Maintainer: David Gibson david@gibson.dropbear.id.au
If there are any issues with this page, please contact me

