Documentation/Platforms/PowerPC
PowerPC Macintosh Emulator
Description
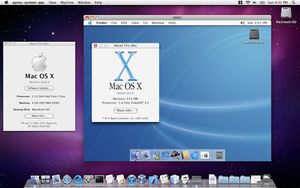
An emulator of the Apple Beige Power Mac G3 and Sawtooth Power Mac G4.
Hardware options
Recent builds of qemu-system-ppc default to emulating a PowerPC Mac G4, Mac Model PowerPC3,1.
The machine model selector on the command line (-m) has three options:
| Machine model selector | Provides |
| -m mac99,via=pmu | pmu power management, providing USB mouse and keyboard (this is the default) |
| -m mac99,via=pmu-adb | pmu power management with adb bus for older OSs not supporting USB |
| -m mac99,via=cuda | cuda power management with adb bus, not well supported |
Guest Compatibility
Note: information true for qemu-system-ppc builds as of 23-06-2018
| Operating System | Status |
| Mac OS 8.0 to 8.6 | Not supported |
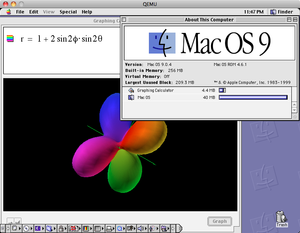
| Mac OS 9.0 | 9.0.4 with rom version 5.6 and above (e.g., 9.0.4 for the Cube) boot and install. |
| Mac OS 9.1 | Boots and installs |
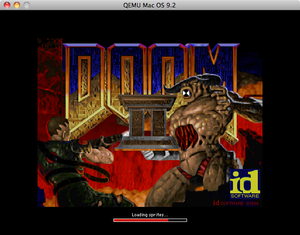
| Mac OS 9.2 | Boots and installs |
| Mac OS 10.0 | Boots and installs |
| Mac OS 10.1 | Boots and installs |
| Mac OS 10.2 | Boots and installs |
| Mac OS 10.3 | Boots and installs |
| Mac OS 10.4 | Boots and installs |
| Mac OS 10.5 | Boots and installs |
| Lubuntu 14 | Boots and installs |
| Fedora 12 | Boots and installs |
| Debian 10 | Boots and installs |
| OpenSuse 11 | Boots and installs |
Build Directions
./configure --target-list=ppc-softmmu && make
Guest Installations
Mac OS/Mac OSX
Mac OS 9.x
Command-line options to install Mac OS 9:
./qemu-system-ppc -M mac99,via=pmu -m 512 -hda <hd image file> -cdrom <iso file of installation media> -boot d -netdev user,id=mynet0 -device sungem,netdev=mynet0
Mac OS 10.X
Command-line options to install Mac OS 10.X:
./qemu-system-ppc -M mac99,via=pmu -m 512 -hda <hd image file> -cdrom <iso file of installation media> -boot d -netdev user,id=mynet0 -device sungem,netdev=mynet0
Mac OS X Server 1.2v3
Installation requires several steps:
Step 1: boot from installation CD, use disk utility to partition disk as Apple Server, quit Qemu and reboot with command line in step 2.
./qemu-system-ppc -L pc-bios -boot d -M mac99,via=pmu-adb -m 256 -net none -prom-env "auto-boot?=true" -prom-env "vga-ndrv?=true" -prom-env "boot-args=-v" -sdl -cdrom OSXServer1.2v3.iso -hda OSXServer1.2v3.qcow2
Step 2: initial installation (note machine and CPU, otherwise no desktop is shown).
./qemu-system-ppc -L pc-bios -boot d -M g3beige -cpu G3 -m 256 -prom-env "boot-args=-v" -prom-env "auto-boot?=false" -net none -sdl -hda OSXServer1.2v3.qcow2 -cdrom OSXServer1.2v3.iso
At the boot prompt enter "boot cd:9,\\:tbxi" Initial installation starts. Quit Qemu after completion.
Step 3: Installation continued. Boot with the following command line to complete the installation.
./qemu-system-ppc -L pc-bios -boot c -M g3beige -cpu G3 -m 256 -prom-env "boot-args=-v" -prom-env "auto-boot?=true" -net none -sdl -hda OSXServer1.2v3.qcow2 -cdrom OSXServer1.2v3.iso
Step 4: Boot the installed system:
./qemu-system-ppc -L pc-bios -boot c -M mac99,via=pmu-adb -m 256 -prom-env "boot-args=-v" -prom-env "auto-boot?=true" -net none -sdl -hda OSXServer1.2v3.qcow2 -cdrom OSXServer1.2v3.iso
Linux
Lubuntu 14
Installation:
qemu-system-ppc -L pc-bios -boot d -prom-env "vga-ndrv?=true" -M mac99,via=pmu -m 1024 -net nic,model=sungem -net user -sdl -hda lubuntu14.qcow2 -cdrom lubuntu-14.04.5-desktop-powerpc.iso
Running:
qemu-system-ppc -L pc-bios -boot c -prom-env "vga-ndrv?=true" -prom-env "boot-device=hd:,\yaboot" -prom-env "boot-args=conf=hd:,\yaboot.conf" -M mac99,via=pmu -m 1024 -net nic,model=sungem -net user -sdl -hda c:\Linux-disks\lubuntu14.qcow2 -cdrom c:\Linux-images\lubuntu-14.04.5-desktop-powerpc.iso
Fedora 12
Installing:
./qemu-system-ppc -L pc-bios -boot d -prom-env "vga-ndrv?=true" -M mac99,via=pmu -m 1024 -net nic,model=sungem -net user -sdl -hda fedora12.qcow2 -cdrom Fedora-12-ppc-DVD.iso -g 1024x768x32
Running:
./qemu-system-ppc -L pc-bios -boot c -prom-env "vga-ndrv?=true" -prom-env "boot-device=hd:,\yaboot" -prom-env "boot-args=conf=hd:,\yaboot.conf" -M mac99,via=pmu -m 1024 -net nic,model=sungem -net user -sdl -hda fedora12.qcow2 -g 1024x768x32
Debian 10
Note: does not get to desktop yet when running
Installing:
./qemu-system-ppc -L pc-bios -boot d -prom-env "vga-ndrv?=true" -prom-env "auto-boot?=true" -M mac99,via=pmu -m 1024 -net nic,model=sungem -net user -sdl -hda debian10.qcow2 -cdrom debian-10.0-powerpc-NETINST-1.iso -g 1024x768x8
Running:
./qemu-system-ppc -L pc-bios -boot c -prom-env "vga-ndrv?=true" -prom-env "auto-boot?=true" -prom-env "boot-device=hd:,\yaboot" -prom-env "boot-args=conf=hd:,\yaboot.conf" -M mac99,via=pmu -m 1024 -net nic,model=sungem -net user -sdl -hda debian10.qcow2 -g 1024x768x32
Pre-installed images of Debian Squeeze and Wheezy (both minimal and with desktop) can be found here: https://people.debian.org/~aurel32/qemu/powerpc/
OpenSuse 11
Installation of OpenSuse11:
./qemu-system-ppc -L pc-bios -boot d -prom-env "vga-ndrv?=true" -M mac99,via=pmu -m 512 -net nic,model=rtl8139 -net user -sdl -drive file=opensuse11.iso,format=raw,media=cdrom -drive file=opensuse11.qcow2,format=qcow2,media=disk -g 1024x768x16
Once the license screen appears, press Ctrl-Alt-Shift-X to open a terminal. Follow https://en.opensuse.org/SDB:Install_openSUSE_on_an_Apple_PPC_computer to create partitions with pdisk. Write the map after partitioning and continue with Yast. Once Yast arrives at partitioning, select Expert partitioning, select the Hard disk and click Rescan disk.
Leave hdb2 as it is.
Edit hdb3 to format as Ext2, mount at /boot and set fstab option to: Mount in /etc/fstab by to Device Path (instead of Device ID)
Edit hdb4 to format as Swap and set fstab option to: Mount in /etc/fstab by to Device Path (instead of Device ID)
Edit hdb5 to format as Ext3, mount at / and set fstab option to: Mount in /etc/fstab by to Device Path (instead of Device ID)
Accept the partitioning and continue with formatting. Continue installing. There will be an error while the boot manager is installed. Ignore it, do not retry and wait for the installation to finish and the system reboots. Quit Qemu at the openbios screen and edit your command line:
./qemu-system-ppc -L pc-bios -boot c -prom-env "vga-ndrv?=true" -M mac99,via=pmu -m 512 -net nic,model=rtl8139 -net user -sdl -drive file=opensuse11.img,format=qcow2,media=disk,index=1 -g 1024x768x32
Mac OS 9 Debugging tips
Macsbug can be used to tell you what exactly stopped booting. The link for it is below.
Mac OS 9.2 comes with a built-in debugger. To use it, set the OpenBIOS variable “APPL,debug”:
Via QEMU's command-line options:
-prom-env aapl,debug=2000000
In OpenBIOS type:
dev /
2000000 encode-int *Note: the number can be replaced with the many options available
“ AAPL,debug” property
then to boot from a cd type:
boot cd:,\\:tbxi
To boot from a hard drive image:
boot hd:,\\:tbxi
Emulated hardware issues
Linux is able to use a wide variety of emulated hardware available to QEMU. Sound and networking devices work well with it.
Mac OS 9 and Mac OS X currently only support sound in experimental builds.
Links
Google Summer of Code Discussion for Mac OS 9
Macsbug 6.6.3 - debugger for Mac OS 9
Darwin OS installation iso file
JQEMU - graphical manager for QEMU (requires Java)
PowerPC Assembly Language Tutorial
QEMU PowerPC mailing list
Beige Power Mac G3 info
Sawtooth Power Mac G4 info
Pictures
How do I help
QEMU has many systems that can always be improved. Here is a brief list of possible areas you may want to work on:
- Documentation
- Testing
- Fixing operating system compatibility issues
- PowerPC emulation
- User interface
- OpenBIOS (firmware)
- Implement a sound card that is compatible with Mac OS 9 and Mac OS X. The usb-audio device is the closest to working on the Mac OS.
- Implement a 3D video card
- Improve various hardware (via-cuda, ata controller, etc..)
Knowledge in these areas could help:
- PowerPC Assembly
- 68K Assembly
- Embedded Programming
Contacts
Maintainer: David Gibson david@gibson.dropbear.id.au
If there are any issues with this page, please contact me

